FINISHED! Salme Playsuit!

Salme Playsuit in Liberty
I love Tuesdays.  I get to finish work early (or not work at all) I get to pick up the boys early and we don't have any after school running around.  Bliss.  So taking full advantage of this, we all potted around, made the first batch of sorbet for the season and  I finished the Salme Playsuit that I was whining a bit about yesterday.  No photos of me wearing this as I probably need a bit of Spring colour on the old legs, but all in good time. Tonight just the old 'stick the garment on the wall in bad light" photo.
Salme Playsuit in Liberty
The waist has a bit of elastic in it so sits more ruffled than it looks in this photo ... and I roll the legs up!
So the verdict?  Despite my reservations about the instructions and maybe the slight tightness over the bottom and my choice of buttons being not so great.  I LOVE THIS.  I really really love it.  If I saw this in the shop I would be falling over myself to buy it.  Can't wait for a lovely sunny summer day to wear this.

I made only a few alterations:  buttons instead of snaps; because now I'm all about putting buttons onto things, slightly longer in the leg so I can roll them up and binding in the arms rather than just hemming.

Et voila!

P.S.  Tomorrow the boys are off to a Halloween disco!?  I've made Elliot a Mr Goop costume..  who is Mr Goop you might ask.  Well stay tuned for my Halloween creation!

Romper Stomper

Digital Sewing Pattern - PlaysuitDigital Sewing Pattern - Playsuit
I am making progress. Slow and painful but definitely progress on my Salme playsuit.  I have finally put the pockets into the shorts.  It took me 2 hours. Yes 2 hours.  How hard can pockets be I know you are thinking, well, this pattern makes hard work out of them.  I really want to love Salme patterns, but as I said when I made the Pussy Bow Dress the instructions could be done much better and it is definitely true of the playsuit where there are some weird pocket pieces. I have two halves done now, so all I have to do is sew them together and finish it (this could take a while given the timing of what I've done so far). 

I saw the forecast for the weather yesterday which said it is going to be 27 and sunny on Sunday (for Elliot's 4th birthday party - a Robot party!?), so I was all keen to finish the playsuit and wear it.  Now it looks like it will be 22 and cloudy with possible showers, so no need for me to panic.

The other thing that makes me think I might need to rethink my (children's) party hostess outfit is that I am making the romper out of Liberty of London D'Anjo and when I tried the two pieces on (with pins sticking in every which way)- trying to work out what they would look like and if it was even going to fit.. I looked decidedly like I could be in pyjamas.  Not convinced by this outfit.
.. maybe I just need the right shoes and accessories.  Stay posted.

Preschool Fete 2012

We made over $800 (exact figure to be determined) from our little art and craft stall today at the preschool fete.. although this figure had much more to do with the cupcake decorating and the slime (and other sensory games) than it did with selling any craft.  It made me think about next years fete and whether I would spend all the time making tissue pockets and bibs and hair bands.  I suppose they all add to the ambience of the fete even if they don't sell. We did have the most perfect weather!


A break in transmission

Last night I took a small break in the fete sewing and started sticky taping and cutting out the Salme Playsuit. I'm going to make this up in some new Liberty of London fabric I bought on Tuesday (which has been washed but not ironed - obviously).  I might even add a pussy bow to it...
It was so nice to do a bit of selfish sewing for a while.

Fete Sweat Shop

I am in the middle of crazy panic sewing for the preschool fete*. Yes I am sewing and panicking as if no one else is making anything and I have sole responsibility for stocking the stall.  Which of course is not the case.  At least I hope not. I am not focussed and am blindly making anything that will use up fabric from the stash.
I am sure that just giving $100 (which is probably more than my little things will make) to the preschool would be a lot easier!
Below is my mound of Liberty tissue holders (I wonder the collective noun is - a sneeze of tissue pockets?).  I'm off to make headbands now...
I promise to be back to some regular sewing soon!  (In fact bought something at the fabric shop today!!)

* If you happen to be in Canberra Australia it's on 10am-2pm, French Australian Preschool Astrolabe St Red Hill on Saturday 27 October.  Come and say hello.

Birchfabrics organic knit

Did you see the latest from birchfabrics on their blog today?  I love this organic knit. After my superb failure with my refashion tshirt during KCWC I am keen to try again with tshirts, probably using this pattern.  Hang on a minute.  I've finished KCWC so I don't need to make any childrens clothes.  But.. maybe I could do something in the chevron for myself...  
I wonder when it will be available?


Photos courtesy of Birchfabrics

KCWC Day 7

Sewing time: 1pm - 2.15pm
It's over. Thank goodness.
PA140399
I've ended this challenge with a funny pair of shorts that accidentally are remarkably similar to the Australian World Series cricket pants.  Would I have made these had it not been for KCWC? Most certainly not but hey.  He seems to like them.
I used L from Happy Homemade Vol 2 as usual.  They are a bit big but no big deal.
PA140400
PA140409

KCWC Days 5 and 6

A bit of sewing here and a bit of sewing there

After feeling less than satisfied with the way KCWC was panning out on Day 4, I found a bit of mojo and actually started to enjoy myself on Day 5 and 6.  As you will see there are some ups and downs with the sewing but the main thing for me was that it became less of a chore!

So first up a fun failure!
I bought this Marc Jacobs tshirt 6 years ago from ebay.  I adored the fabric and the style but to be honest it was always a bit too big and the fabric was starting to wear.  So I took to it with scissors to make a top for Elliot.
Strangely, when you see the half finished failure below, I had a lot of fun while attempting to make this top  (based on the flashback skinny tee pattern).  This was my first go at up cycling a piece of clothing and it was actually fun to work out where I might put the different parts of the original tshirt.   The funniest bit is the pocket at the front which was actually the back of the shirt. I kept the tag in it just to be reminded of it's origin.  The material is so soft that Elliot put it on and called it his 'warm up tshirt'.  It might have something to do with the super tight sleeves..

So yes, I did have problems by the number:
The sleeves are super skinny and so I now realise if I'm making a short sleeve tshirt I need to adjust the pattern a bit.
I didn't have enough fabric in the body so when Elliot tried it on it was a bit like a midriff top.
And obviously things went all wrong with the neck (my inexperience with knits is showing through and I now realise that the neck piece should have been much shorter...doh... can you believe I actually added fabric to the neck thinking I had cut it wrong??!!).  Anyway off to the trash with it unless I can thing of something else to do with it....maybe a pair of baby legs???

Now to my work in progress..  Realising that the problem I was having with KCWC was my lack of interest in the materials I was working with (booooring) I pulled out some left over drill from costumes I've made and told Elliot to choose the colours he wanted for a pair of shorts. So this is what he chose!

Australia retro cricket clothing
Dennis Lillee 
I should finish KCWC with a bang as these are almost done.

The really scary thing is that somewhere in my subconscious they have ended up taking the form of a pair of coloured Australian cricket pants from 70s-80s world series cricket right down to the green pocket.  This is unintentional.  Really!
At least the waist band will be blue???!  Don't worry, I won't be making a matching top or matching Dennis Lillee moustache or maybe....

Just in case you want to make a baby kerchief...

Here are the measurements that I use for the baby kerchiefs that I've made.  It's not rocket science but from my experience the hardest part is working out measurements.  I use velcro because it's easier with a baby/toddler but you could just as easily use a press stud or something else.


You will need:
2 pieces of fabric for the front and back of the kerchief: 25cm x 60cm (22inches x 10 inches)
1 piece of flannel or other material for the middle, this helps with trapping the moisture. 25cm x 60cm
  (22inches x 10 inches)
Velcro strip 4cm (1 ½ inch)
Variation:  You could just have a nice fabric on the front and then towelling or fleece or something like that on the back!!


Instructions
Make a fabric sandwich: with right sides of fabric together and then flannel on top. 
Sew around using a 1cm seam allowance, leaving aproximately 7cm unsewn.  Trim corners and turn out. 
Make corners nice and pointy or as pointy as you can.  Iron and then sew around.
Sew on velcro (I do it horizontal to the long edge).  Et voila you will have a very stylish and dry little person!
Note on measurements: this kerchief will generally fit any child from around 12 months and up (even to 4 years) justreduce the measurements ever so slightly if it is for a young baby.

kerchief pattern

FINISHED! A lunch bag!!*!

As we move through the second month of Spring (despite snow around the region yesterday!) I've been trying to take a salad to work (yes yes very virtuous) and often I also take a bowl with cereal or something in it for breakfast.  I usually don't sit down to breakfast at home (many cups of tea yes, but not breakfast) so I usually have something at work.
I have been carrying all these containers and whatever else I snack on at work in a plastic bag and every day this week on the walk from the car park to work I've been thinking about the bag I need to make to carry all of this.
So today I made something.
PA130373
 I used fabric from the stash which I love and bought at Addicted to Fabric when I first started sewing about 3 years ago.  It's very Japanese cutesy but it always makes me smile.
PA130370

I used this pattern to help me work out how I was going to make the boxy style.  I put batting in it to give it some substance.  Once I'd finished the whole thing I took one of the plastic bottoms out of a supermarket shopping bag and put it in the bottom.  I had wondered whether I should have done this earlier and sewed it in but am glad it will just sit in the bottom because it will make it heaps easier for cleaning and washing.
PA130369

The top and the sides are closed with velcro, which is not very glamourous but is functional!
So there we have it.
PA130367

KCWC Day 4

Day 4 Sewing time: 4.45pm- 5.45pm
It's pitiful how much little I managed to sew on Day 4 in one hour.  Another little kerchief:
Untitled
And some plastic hair band bows using this tutorial.  I will now hide my head in shame at my output and think carefully about what I will do tonight to improve.
Untitled

KCWC Day 3

Day 3: sewing time 8.30 - 9.40pm
They are finished, but they aren't great.  The wine I had at the preschool fete meeting prior to sewing didn't exactly improve my matching skills and to be honest I felt like these were a bit of a chore.  I suppose that's why it's called KCW CHALLENGE.   I still love the pattern I used which is L from Happy Homemade vol 2, which I see has now been translated into English from the Japanese original.  I can't recommend this pattern enough.  The pockets, fake fly and elastic waist are great.
PA100338
Oliver loves them and I can see they will be great on a hot summer day with sandals so while I'm being hard on myself they are loved and will be worn.
PA100344


KCWC Day 2

Day 2: 5.05pm to 6.20pm
PA090334
Yes, woops over one hour today! Tonight I did make some further progress with the check pants for Oliver and am confident that I might even be able to finish them tomorrow.  I did have a few moments tonight where I wondered whether I am actually sewing the material the wrong way around - but I'm running with it..

To liven the sewing up a bit I also made a quick 'kerchief' which I'll add to the pile of things to sell for the preschool fete craft stall (after I can remove it from Elliot).  When Elliot was a baby (and toddler) he wore these all the time (though unfortunately never a Dr Suess one).  In my humble opinion they are far more classy than a bib or a wet tshirt from baby drool.  Hopefully someone at the fete will think the same.
PA090336
Unfortunately, I cut the material out a bit 'upside down Miss Jane' but never mind.  I think it is still pretty adorable.  I seem to have quite a bit of Dr Suess material in the stash which I'll use up for the fete so prepare for more Dr Suess creations.

KCWC Day 1

Day 1: 5pm - 6pm.
It's a public holiday today so while normally this time would be out of bounds for sewing the easy (no school no work) day allowed for a steal of this timeslot.
PA080316
For some reason I found the sewing against the clock (my own rule mind you) pretty stressful - like I was in some crazy race to get things cut and sewn (I regret greatly the fact that I didn't have something already cut out.. having something already started may have helped calm me down) but I cooled down and got the pants cut out, back pockets sewn on and the front pockets started.  Not bad for an hour  - which went so super quickly.  Without the imposed one hour limit I could see myself trying to get them finished tonight but I stuck to my commitment and it was tools down at 6.
So, no finished objects but a good start and when I asked Oliver whether he was going to wear these pants he said "I know I'm going to love them".  Well that's one of us!

FINISHED! Salme Pussy Bow Dress

PA070311
This morning (just in time to start KCWC tomorrow) I finished the Salme Pussy Bow Dress in Liberty of London Viola B.
I used this tutorial to add a lining to it - because it's Frocktober and adding a lining to a dress was my self improvement project.  I also added some pockets because frankly a dress needs pockets!! I  left the collar the same size all around rather than have it smaller at the back - I like an even collar at the back (there was also a bit of laziness and a bit of confusion with the pattern thrown in).
So the verdict:
PA070307
The pattern: I'm pretty happy with the Salme pattern and given it was the first print at home pattern I've made it was easy to put together and a bit easier than tracing.  The pattern didn't have a seam allowance which is fine for me as I'm used to sewing Japanese patterns.  The instructions probably could have been a little bit better put together (format definitely - although this might have been about saving paper and content - especially around adding the collar on) but for good sewers you probably wouldn't have needed the help with the collar that I did.  I'll definitely buy another of their patterns and I'm itching to buy the playsuit pattern)
The tutorial on putting lining on was helpful, although for the arm holes I understitched the dress and lining to the lining rather than topstitched (I think this gives a nicer finish?) and I felt a bit lost about how to put the collar on (there is a theme here!) but in the end it all worked out.  I didn't baste the skirt and lining together like the tutorial said which was a big mistake because later I was trying to line the two up when adding the elastic and ended up basting it anyway.
The sizing: In term of sizing I took the size of my waist rather than hips and bust, but I probably could have gone with the lower size as I feel that the arm holes a bit gapey and the length of the bodice isn't quite right - but otherwise a looser fit is nice to wear.
Overall I'll be wearing this dress on Tuesday to work (yay for another long weekend here!) and feeling pretty money in it.
PA070310

KCWC A Plan of Attack

Monday 8 October marks the start of KCWC, so for the following 7 days I will dedicate 1 hour per day to making my boys some clothes.  There are two other things that I'm going to commit to for this week:

Firstly, I'm only going to do one hour a day.  No more.  I might even have a timer on so that after one hour I have to stop.  I have a tendency to say to myself and my boys - I'll just do this little bit which then snowballs and the sewing takes over everything, but not this week.

Secondly, I've committed to using material from the stash, which is frankly a bit boring to me, but there it is and I've made the boys pick out what they want so there's no turning back. No buying more interesting fabric.  I will allow myself to buy some elastic but that's it.
PA050299
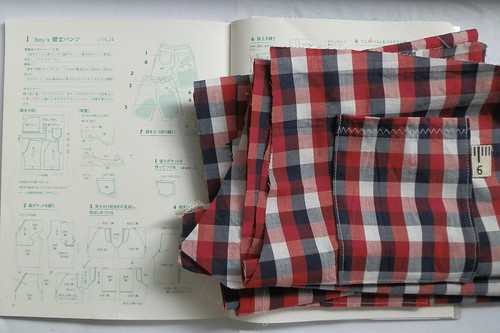
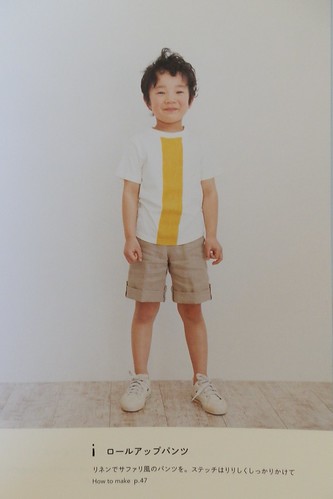
Now to my sewing plan which will be using patterns from this great Japanese pattern book: Happy Homemade Vol 2.
PA050301

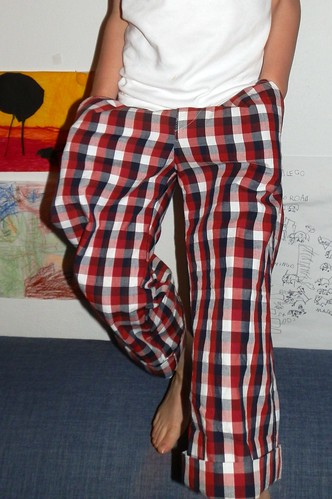
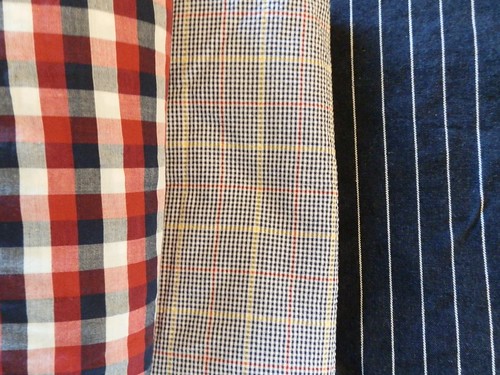
1. A pair of pants for Elliot out of the pin striped denim that Ben bought back from a trip to Japan a few years ago (this will be L but made into pants)
PA050303
2. Oliver wants shorts made out of the red and blue check (so I'll do 'I'  just so I can do the button and button hole)
PA050302
3.  Elliot says he wants a t-shirt out of the sear sucker (??) but I'll see how I'm going for time and will probably just make him some shorts..

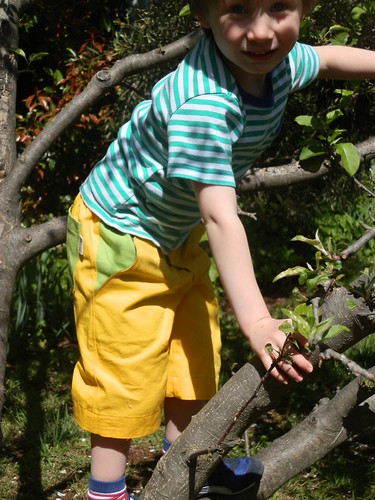
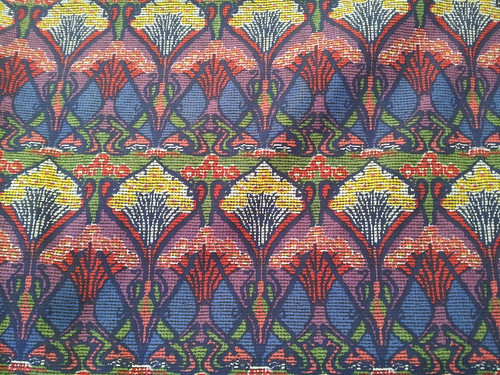
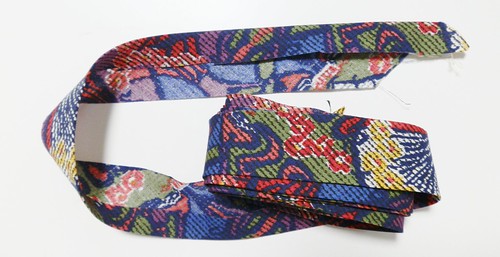
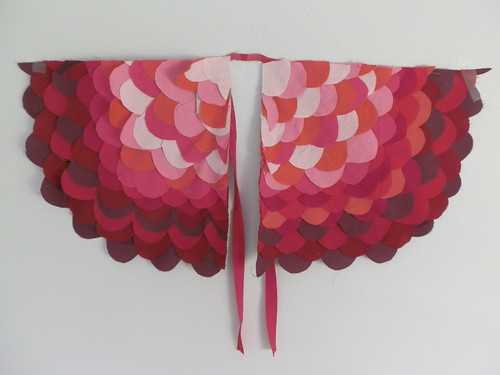
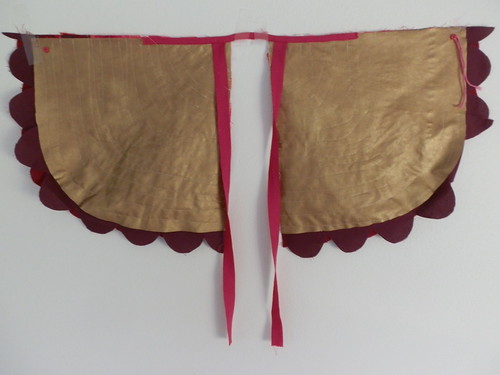
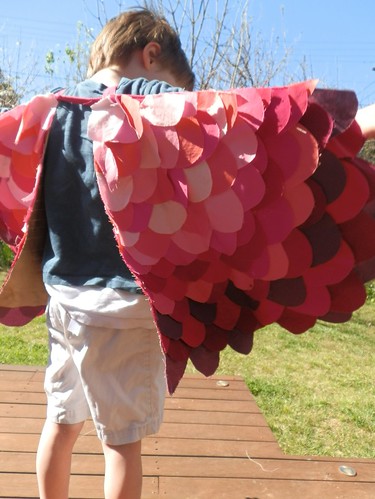
4.  I have quite a bit of coloured drill left over from costumes so might be able to squeeze out of pair of shorts or pants using this as an inspiration.

The goal is one piece for Oliver and one for Elliot.

L (and I) from Happy Homemade Vol 2 is a really really great pattern with a fake fly and an elastic waist. Perfect for little boys.  I have already made it a number of times for the boys and have used the concept for two pairs of pants for myself (my Aladdin pants and my knickerbockers).

Oliver used to have a pair of pants made out of the check seersucker which looked fantastic and very 'golf'.  Unfortunately we went to a party at a park last year and he and some friends decided that the concrete skate half pipe was a slide and after spending half the afternoon sliding down the concrete wore the bottom out of them.  Devastated I tried to sew them up but alas they were shredded beyond repair.

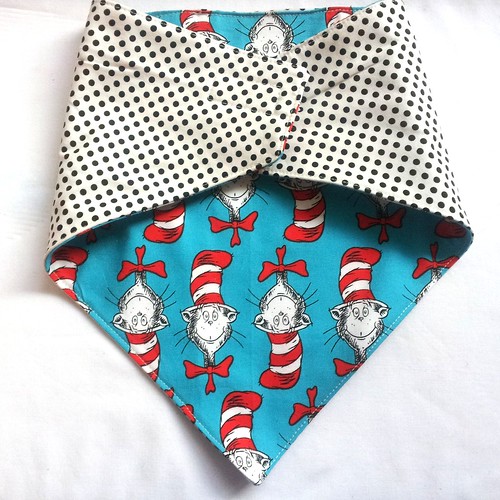
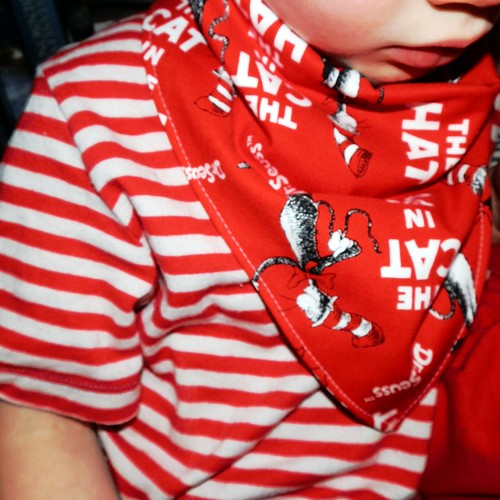
If I'm feeling bored with my sewing during the 7 days, I'm also planning a robot party for Elliot's 4th birthday party which we will do early November so I might sneak in a few robot things - otherwise I've still got to make items for the craft stall at the preschool fete on the 28th October so I could sneak in a bib or two.  In fact given my slow progress on items for the craft stall I might need to do a craft stall sewing week challenge the week after!!

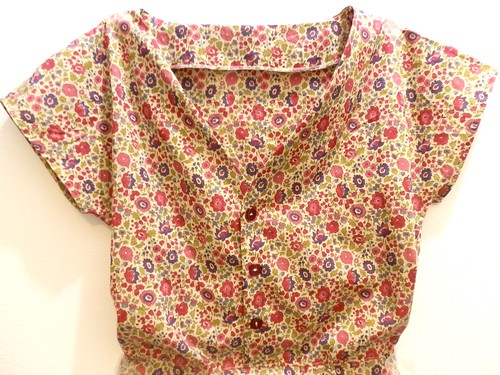
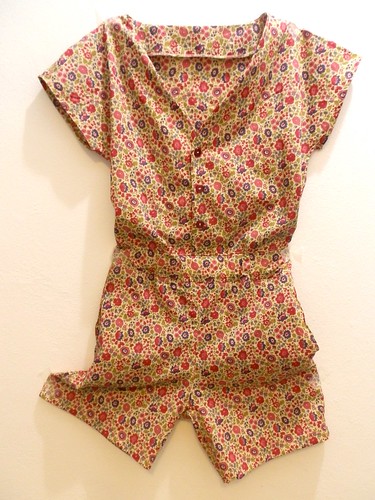
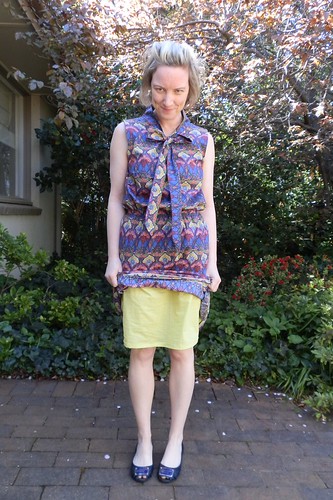
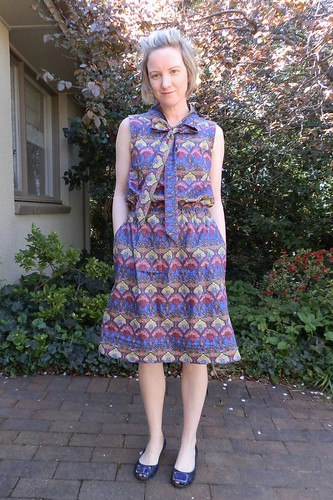
This weekend though, I need to finish my dress!

Frocktober resolution (and a revelation)

For the last few months, after being inspired by the post on how to develop better sewing habits, I have been trying to focus on one part of sewing that I am either not good at or avoid.  August was buttons, September was zip-tember and now October will be all about lining.  OK, it doesn't sound that interesting but there are a few people who are participating in Frocktober raising money for Ovarian cancer so really, what better thing to do in October than make a frock with lining (and donate to Frocktober!).
I read this blog the other day, loved the pussy bow dress and when I saw that she had done a tutorial on how to add lining I knew what I was going to make next.
There are two things I love: Liberty fabric and a pussy bow and so voila, we have it: my October resolution project. I bought this fabric from  Addicted to Fabric back in July so it will finally emerge from the stash and I'll use the same SALME pattern , with the lining tutorial.  I've never done a  dress with lining and the Liberty of London fabrics which I often use for dresses really do need lining, so perfect.
Untitled
Viola B from the AW12 Embellishment story
I had never heard of Salme patterns before, but there are a couple of really cute patterns, I especially love the playsuit!  Check them out!

Now to my revelation:  By accident I found this post on how to make a continuous strip of binding (5 yards out of a fat quarter).  I didn't quite have a fat quarter left so just used a ratio to work out the measurements..and it worked!! And it was fun (ish)!  Funny I won't now need it for the armholes as the dress will be lined - but there is always a use for binding!!

PA020295
P.S. I have thought ahead to November.  It will be NO new material or patterns-VEMBER .. I need time to catch up on the projects in the pipeline and if I'm honest I have enough fabric... (except I DO need some fabric for the PAVOT- best purchase that in October! and maybe that playsuit pattern!).  I can see why my boys always want new lego even though they have a room full of it!  There might be a little bit of me in that! Just a little.

FINISHED! Bird Wings

PA010250 - Copy
Finally!  I have finished the bird wings I started a few weeks ago using this tutorial.  For some reason there was quite a bit of unpicking happening and so as the 'lucky' recipient is flapping their wings, no doubt a whole lot of cottons are going to come flying out.
PA010253
Ben thinks the way it sits on the top part of the back and then ties at the front is a choking hazard and he is probably right, so for the Christmas wings I have lined up to make when I regain some enthusiasm for the project, I change the top to add a collar (with velcro probably - or maybe press studs if I'm really motivated) rather than the ties.
What I thought was a brilliant invention (the buttons at the bottom to thread elastic or ribbon through for the fingers/hand is probably not as great as I thought it was and I will probably add a cuff like attachment.
PA010259
All in all, they took way more time than I expected but despite being particularly handmade, 
they are pretty cute.
PA010257